I am so tired of seeing “influencer” tutorials suggesting you need a $300 ring light and a professional-grade backdrop to look decent on camera. It’s nonsense. Most of that advice is just extra friction—more gear to plug in, more cables to tangle, and more money leaving your bank account for a marginal gain. If you’re looking for how to look better on video calls, you don’t need a studio setup; you just need to stop fighting your environment. I spent fifteen years in corporate boardrooms where the lighting was always terrible, and I learned early on that competence isn’t about production value, it’s about clarity.
I’m not going to give you a list of expensive gadgets to buy. Instead, I’m sharing a few battle-tested, low-effort adjustments that actually work in the messy reality of a home office. We’re going to focus on the high-impact moves—like repositioning a single lamp or fixing your camera angle—that take less than two minutes but make you look significantly more composed. My goal is to help you look professional without reorganizing your entire life just to hit “Join Meeting.”
Table of Contents
Improving Webcam Video Quality With Minimal Effort

Most people think they need a studio-grade ring light to stop looking like a grainy ghost in a dark room, but that’s just more gear to manage. If you want to start improving webcam video quality without turning your desk into a film set, just look at your windows. Position yourself so the natural light hits your face directly. If you’re sitting with a window behind you, you’ll end up as a dark silhouette, which is a waste of everyone’s time. If you don’t have a window in front of you, grab a cheap desk lamp, point it at the wall behind your monitor to bounce the light back, and call it a day.
Next, let’s talk about the physical placement of the hardware. Stop looking down into your laptop; it’s not a flattering angle and it makes you look like you’re constantly inspecting your own chin. The goal is to get the lens at eye level. If you’re on a laptop, stack a few heavy books under it until the camera is level with your gaze. Finding the best camera angles for remote meetings is really just about gravity and a little bit of elevation. It’s a two-minute fix that makes a massive difference in how much authority you actually project.
The Best Camera Angles for Remote Meetings That Actually Work
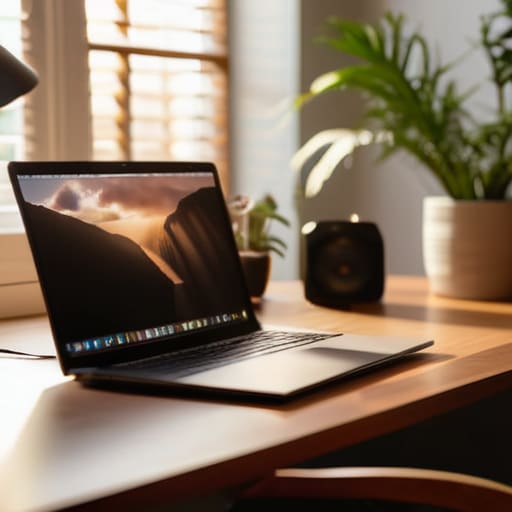
Most people default to the “laptop on the desk” position, which is a mistake. It forces you into a permanent state of looking down at your audience, creating that unflattering double-chin effect and making you look like you’re looming over them. If you want to master the best camera angles for remote meetings, the golden rule is simple: get the lens at eye level. I usually just grab a couple of thick hardcover books or a dedicated laptop riser to lift the device up. You want the camera to meet your gaze, not the other way around.
Once you’ve fixed the height, pay attention to the tilt. A slight downward angle can make you look more engaged, but avoid tilting the camera up from a low position—that’s just asking for trouble. I also suggest backing up just enough so that there is a bit of “headroom” above you. You don’t want your forehead touching the top of the frame, nor do you want to look like a floating head. It’s a small adjustment, but it’s one of the easiest ways of improving webcam video quality without spending a dime on new hardware.
Five Low-Friction Fixes for a Better Presence
- Stop fighting your overhead lights; just grab a desk lamp, point it at your face, and call it a day. Shadows under the eyes make you look exhausted, and no amount of “beauty filter” software will fix bad lighting.
- Clean your lens. I know it sounds trivial, but most of us are staring at a smudge of fingerprint oil every single morning. A quick wipe with a microfiber cloth makes the image crisp instead of hazy.
- Fix your background before you start your day. You don’t need a professional studio; you just need to hide the pile of laundry or the unorganized bookshelf. A plain wall or a tidy corner is much better than a visual distraction that pulls focus away from what you’re saying.
- Dress for the role, even if it’s just a slight upgrade. You don’t need a suit, but swapping a wrinkled t-shirt for a structured polo or a clean sweater tells your brain—and your clients—that you’re actually “at work.”
- Check your audio levels early. Looking good matters, but sounding like you’re underwater is a dealbreaker. If your laptop mic is picking up every click of your keyboard, plug in a basic pair of wired earbuds and move on.
The Bottom Line
Stop fighting your overhead lights; just grab a desk lamp, point it at your face, and call it a day.
Get your camera at eye level so you aren’t staring down at your colleagues like a looming boss.
Don’t overthink the tech—if the lighting is decent and your angle isn’t awkward, you’re already ahead of 90% of the people on the call.
The Goal of Visual Presence
“The point isn’t to look like a professional studio setup; the point is to stop letting poor lighting and bad angles become a distraction from the actual work you’re trying to do.”
Diane Sterling-Voss
Stop Overthinking Your Setup

At the end of the day, looking professional on a screen isn’t about buying a $300 ring light or staging a Pinterest-perfect office. It’s about removing the distractions that pull focus away from what you’re actually saying. If you’ve fixed your lighting with a simple desk lamp, angled your camera so you aren’t staring at your own chin, and cleared the immediate clutter from your background, you’ve already done 90% of the work. You don’t need a studio setup; you just need a functional environment that doesn’t scream “I’m struggling with my tech.” Once these basic systems are in place, you can stop fiddling with your settings and start focusing on the meeting itself.
My goal isn’t to help you become a professional streamer; it’s to help you reclaim the mental bandwidth you usually waste worrying about your appearance on screen. We spend far too much time obsessing over minor imperfections that most people don’t even notice. Set up your space once, build a repeatable routine, and then let it go. The most important part of any video call is your presence and your expertise, not the resolution of your webcam. Get the basics right, get comfortable, and then get back to the work that actually matters.
Frequently Asked Questions
Do I really need to buy a dedicated microphone, or can I just use my laptop's built-in one?
Look, if you’re just checking in with a teammate for five minutes, your laptop mic is fine. But if you’re leading a presentation or sitting in back-to-back client meetings, it’s a liability. Built-in mics pick up every click of your mechanical keyboard and the hum of your AC. You don’t need a professional studio setup, but grab a decent USB headset or a simple plug-and-play mic. It saves you the headache of people asking you to repeat yourself.
How much background clutter is too much before it becomes a distraction?
If your background looks like a laundry pile or a disorganized bookshelf, it’s too much. It doesn’t have to be a sterile white wall, but it should be “quiet.” If a person’s eye naturally drifts to a stack of mail or a stray coffee mug behind your head, you’ve lost the room. Aim for a single, intentional element—a plant or a tidy shelf—and then stop. If you have to spend twenty minutes cleaning it, just use a blur filter.
What should I do if my internet connection is too weak to support high-definition video?
If your bandwidth is tanking, stop trying to force high-def video; you’re just making the lag worse for everyone. Turn off your outgoing video entirely. It sounds counterintuitive, but a clear, stable audio connection is infinitely more professional than a frozen, pixelated version of your face. If you must be on camera, drop your resolution settings in the app or switch to a lower frame rate. Save the bandwidth for the actual conversation.